FireEscape2000 Installation Guide
Required Materials (Not Provided)
- (6) 3/8" x 5" lag screws
- (6) matching washers
Required Tools
- Drill with 3/16" pilot bit (for pre-drilling holes)
- Socket wrench or impact driver (for lag screws)
- Allen wrench (for set screws)
- Level
- Measuring tape
- Safety gear (gloves, protective eyewear)
Safety & Preparation
- Ensure the window is fully operable and can open/close smoothly.
- Confirm the wall or window frame surface is clean, level, and capable of supporting the installation.
- Always wear safety gear during installation.
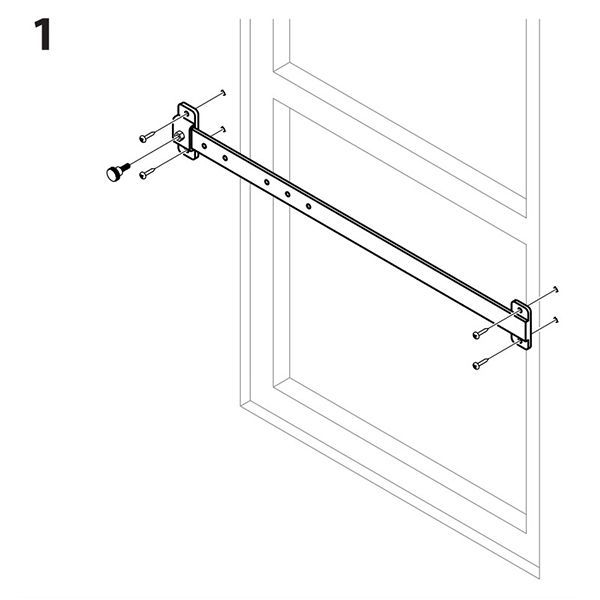
Step 1: Mount the Top Bracket (Bracket 1)
- Open the window fully.
- Position Bracket 1 on the left side of the window opening (viewed from inside).
- The bottom opening of the bracket (where the top bracket support arm inserts) should align flush with the window sill/frame when open.
- Insert the Top Bracket Support Arm into Bracket 1 and adjust its width for a snug fit.
- Secure the support arm to Bracket 1 using (2) 3/8" x 5" lag screws with washers.
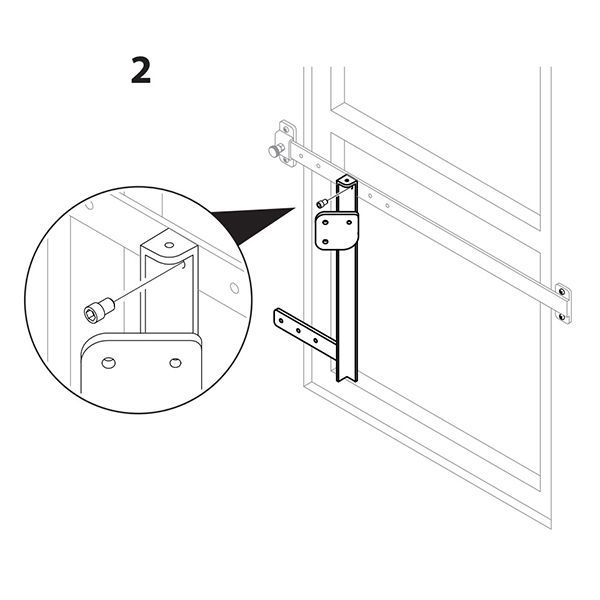
Step 2: Attach the Lower Support Arm
- Bring the Lower Bracket Support Arm up to meet the mounted top support arm.
- Attach the lower arm to the top arm using the set screw (included).
- Do not fully tighten yet—leave room for adjustment.
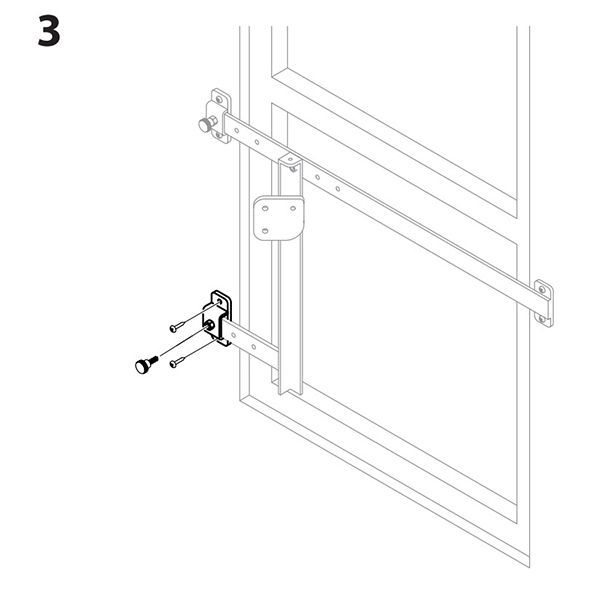
Step 3: Secure the Lower Arm in Position
- Use a level to confirm the lower arm is horizontally aligned.
- Position Bracket 2 over the lower support arm at the designated mounting location.
- Secure Bracket 2 using (2) 3/8" x 5" lag screws with washers.
- Fully tighten the set screw to lock the lower support arm in place.
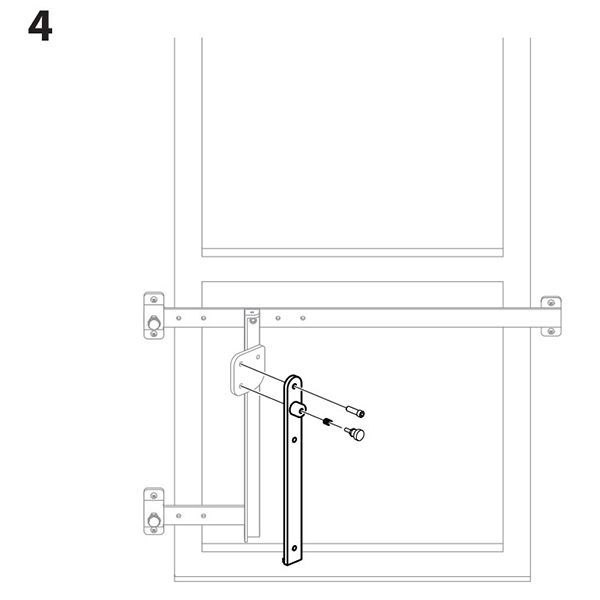
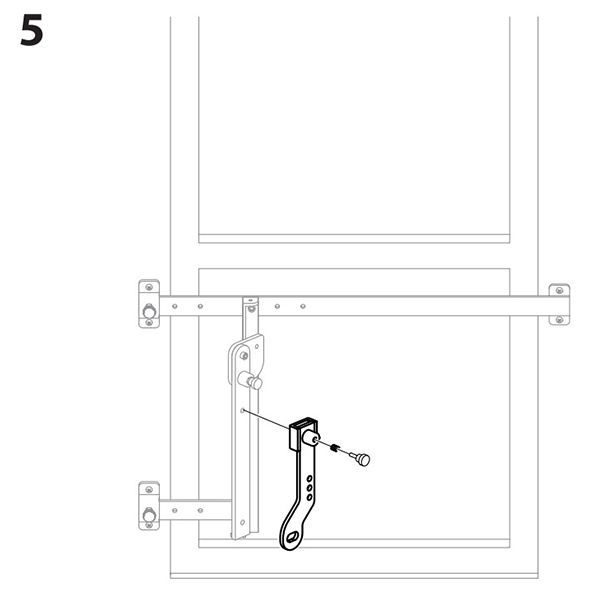
Step 4: Install the Swinging Arm
- Align the Swinging Arm with the lower support arm.
- Mount the swinging arm via the backing plate, securing it with the supplied set screws.
- Tighten until secure, but allow the swinging arm to glide smoothly.
- Important: Do not overtighten set screws, as this may restrict the arm’s motion.
Step 5: Attach the Extendable Arm
- Locate the Quick-Release Latch on the swinging arm.
- Insert the Extendable Arm into the swinging arm’s receptacle and lock it with the latch.
- Verify the latch engages securely and the extendable arm retracts/extends properly.
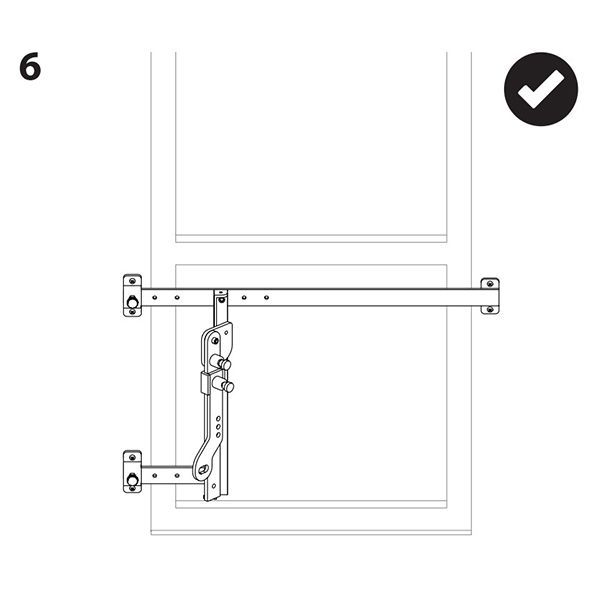
Final Checks & Testing
- Ensure all screws and fasteners are tight.
- Operate the system through its full range (swing, extend, retract).
- Verify smooth operation with no binding or interference.
- Confirm the system is level, aligned, and structurally secure.